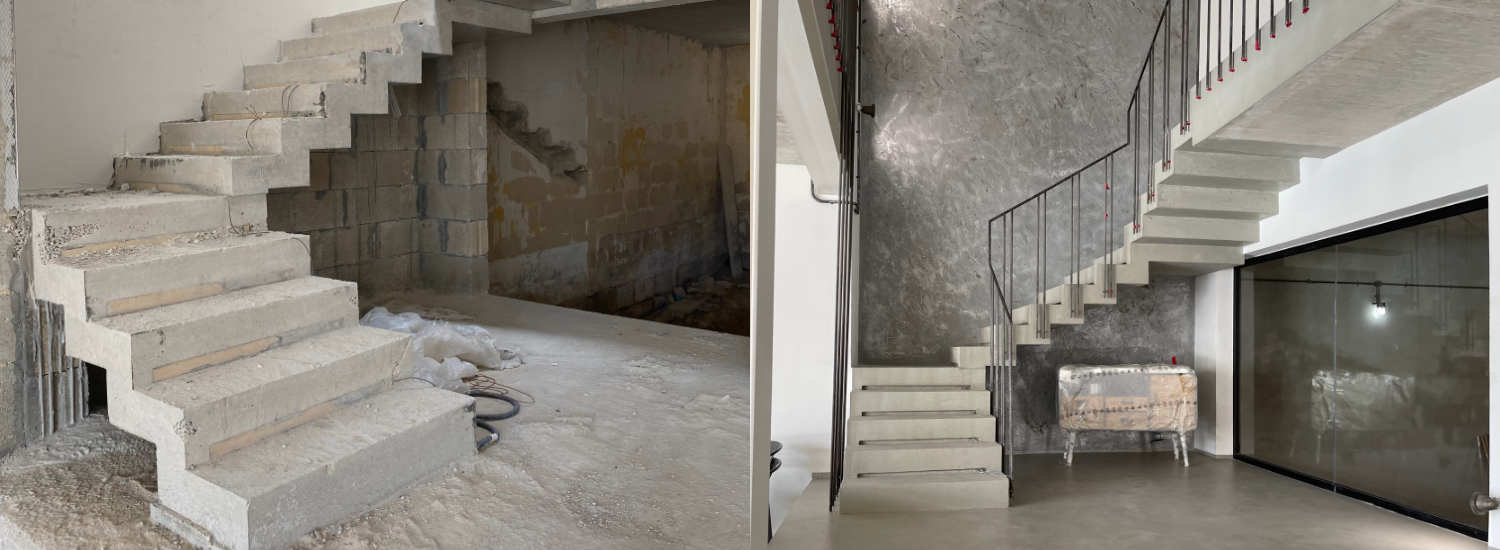
Microcement stairs are a decorative component that delivers excellent aesthetic and practical results because they are personalized to each area, always fitted to your demands.. Stairs were developed and designed to make movements more effortless; properly designed stairs contribute to the overall look of your place. Whether it be your multi-stored house or your office, the staircase is considered an unavoidable part.
Stairs help you to make a move to the upper areas of any place. The visual impact of the staircase easily depicts the picture of your entire property. Due to the easy maintenance and elegancy, the stairs made of microcement is gaining more popularity nowadays. With microcement, it is possible to get a uniform, aesthetic effect to the stairs and floors.
MICROCEMENT STAIR | ADVANTAGES
1. Adhesion Property
The adhesion of microcement is high, and so it becomes easy and will be perfectly adhesive to any surface.
2. Color Options
Microcement offers a wide range of colors, tones, and textures, so the choice of options is quite broad.
3. Fast Execution of Work
The time taken to complete a microcement stair is less when compared to the traditional stairs.
4. Simple Maintenance
It is easy to maintain the microcement stairs , as they can be easily cleaned with the help of a mild cleaner.
5. Eco-Friendly Material
As microcement stairs use environmentally friendly materials, it is entirely safe for human health.
6. Anti-Slip Property
Since microcement exhibits anti-slip properties, microcement stairs are the best option for extra safety.
STEPS FOR APPLICATION OF MICROCEMENT ON STAIRS
1. Assessment of substrate
A project’s success depends on the substrate’s quality, so the proper assessment of substrate is a crucial aspect while making microcement stairs. The substrate of microcement should be without any loose elements and should have the ability to bear the load.
It is consistently prudent not to have messy poured or are covered with mortar that has fallen dry during plastering or when they are old and disintegrate. Microcement is highly flexible, yet here and there, it is smarter to disclose to the customers that under given conditions, another material (e.g., wooden board) will be a better option.Microcement is highly flexible, yet here and there, it is smarter to disclose to the customers that under given conditions, another material (e.g., wooden board) will be a better option.
2. Protection of the surrounding area
Before beginning work, the dividers surrounding the means ought to be covered with solid painting tape and the floor at the base with paper.
3. Grinding stage
Steps ought to be sanded with a disc grinder with a concrete grinding disc. Then, to completely vacuum (we suggest industrial vacuum cleaners) to eliminate dust and any free parts.
4. Priming
Priming is done to match the absorbency of the the substrate.
5. The levelling of steps
According to the nature of the substrate, the steps ought to be evened out to get wonderful right angles and get the corners. On the off chance that the steps are genuinely level, you should adhere aluminium angles to the corners, level with concrete mortar, and wait for binding.
The aluminium profile permits even mortar evacuation along with the steps. In the wake of setting the mortar, sand every uneven part and you can continue to the following stage.
6. Adhesion Promoter Application
The application of adhesion promoter will make sure proper adhesion of microcement and it is an inevitable part of microcement application. It takes approximately 4 hrs for the promoter to bond. ( this time will be less in case of high temperature).
7. Microcement application
Spread the mass using aflow to a thickness of not more than 1 mm. Apply microcement with speedy, energetic movements in precise instructions relying on the expected impact, always with the “wet on wet” method.
After approximately 4 hours, while the material fully sets and is dry, the ground should be sanded using a guide eccentric or oscillating grinder with 60-eighty grit sanding paper. After sanding the floor, the floor should be thoroughly vacuumed. Then follow the second layer in an equal manner as the first to get the perfect microcement stair.
8. Sealing Process
Finally, we cover the steps with layers of sealer. Stairs are exposed to abrasion. That’s why the sealer needs to be very resistant, ideally polyurethane sealer for microcement and urban. For out of doors stairs, use a devoted out of doors varnish. It is also critical to apply an excellent first-class roller. Cheap rollers make lint at the varnish, which can break the very last effect.
Thus after a series of continuous steps, the perfect-looking microcement stairs are ready for use. Click here to learn more about microcement.